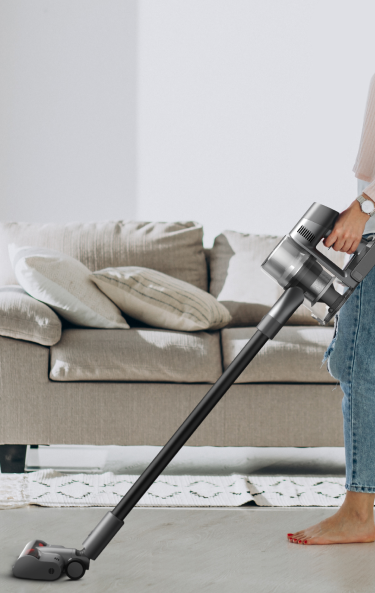
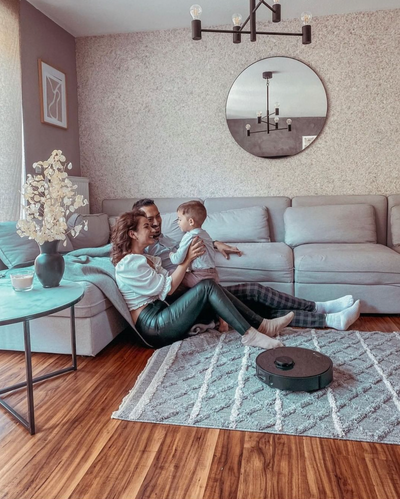
Using a vacuum cleaner correctly is vital to prevent accidents and ensure proper cleaning. Check out to know some important tips to make cleaning easy and safe.
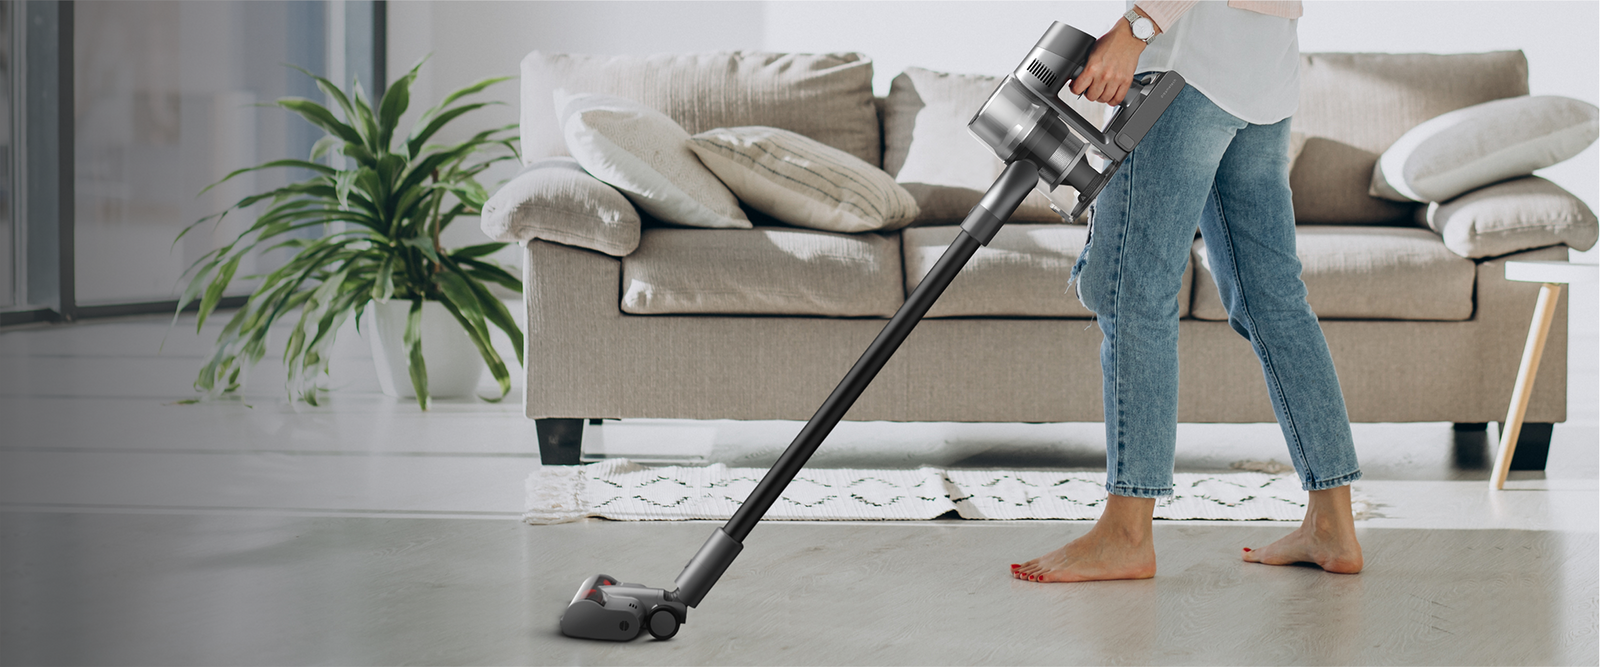
One of the main issues when it comes to vacuum equipment is vacuum storage, especially if you have limited space at home. This is the reason why it is often important to consider storage options before you buy large or bulky items like vacuum cleaners, especially since this type of equipment is a necessity in most homes and apartments.
Read on to know about the different storage options and how to find flexible storage solutions for the vacuum cleaner you have in your apartment.
Things to Consider When Looking for Vacuum Cleaning Storage Space
The Layout of the Apartment
Live in a small space with limited storage options? You may be hard-pressed to find ample storage space for your vacuum especially if you don't have a broom closet or even a laundry area that can double as storage space for cleaning supplies.
One option is to create wall hangers where you can hang cleaning equipment as well as supplies. If you are working with large, ample space creating a nook or corner for cleaning supplies will be easier to do.
Frequency of Cleaning
You want your vacuum and other cleaning equipment to be easy to take in and out especially if you clean multiple times a week. This means finding a space that is easily accessible. A broom closet, the shoe closet, or under the sink are good options for vacuum storage if you clean frequently.
Size of Vacuum
The size of your vacuum also determines what kind of storage space will work for you. Handheld portable units are by far the easiest to store since they can be small enough to stow inside a desk drawer or hang on a coatrack.
If you have a bigger unit like a canister vacuum, you can store your equipment in an empty corner, in the closet, or even under furniture like your bed or the couch. You open up more storage options if you disassemble your vacuum after each use so it is easier to stow away.
Different Types of Vacuum Cleaner Storage Ideas
Robot Vacuum
Most robot vacuums are small and relatively portable, without the lengthy cords and metal handles that characterize older vacuum models. This means that they are easier to park in spaces that are out of the way, such as under your work desk or the couch when not in use.
The Dreame D9 comes with a sleek charging station as well as LIDAR-based navigating technology which allows it to park itself after use, a pretty nifty feature when you are too busy to store your vacuum after it is done cleaning.
Most robot vacuums come packaged with their own charging ports which can easily be installed behind any door or the sofa as long as these places allow for ample movement when you need to charge the vacuum.
Handheld Vacuum
Handheld cleaners are the most portable models of vacuum cleaners and they vary in size, from small cleaners that fit the palm of your hand for easy desktop cleanup to larger handheld types for cleaning the couch or car interiors. These cleaners may come with charging ports that you can install on a wall or they can be hung on a rack in your broom closet.
Don't have a broom closet? You can store your handheld vacuum and its accessories inside your shoe rack, in the coat closet, or on the rack where you store other cleaning equipment.
You can also store it under the sink as long as the space is dry. You can even hang it on your tool rack in the garage. All these are good options for keeping your vacuum in a place that is easy to find and reach.
Canister Vacuum
Canister vacuums are bigger than handheld vacuums in size and capacity. They come with a variety of accessories for different types of cleaning. While they are the most practical for those who want to cover the most amount of cleaning space in the least amount of time, canister vacuums tend to be tall and bulky.
Many users prefer to slip canister vacuums behind a door where they can stay out of sight. Other options include the good old storage or broom closet, the laundry room or mudroom, or even a spare room.
If you have very limited space and this is the vacuum you have at home, you can also slide the vacuum under a sofa or the bed. These vacuums tend to have two rolling wheels which can make sliding furniture for cleaning and storage easy to do. This is a good option if you are living in a small studio or one-bedroom and don't have free closet space for a bulky canister vacuum.
Cordless Vacuum
Cordless vacuum cleaners tend to resemble canister vacuums but they are often smaller in size and they do not need to be tethered to an electrical cord. However, this doesn't mean that they are any less powerful than canister-vacuum cleaners.
The lack of an electric cord makes cordless vacuum cleaners more flexible to use especially if you want to move quickly from room to room. Cordless vacuums may require the same amount of space as canister vacuums, however. This means you may need an empty corner, space in your broom closet or laundry room, or even an unused corner in your closet.
You can also store your cordless vacuum on wall-mounted storage. Cordless vacuums like the Dreame V11 come with a wall-mounted docking station that doubles as storage when the tool is not in use. Install the dock near the closet, on a corner in a low-traffic area, or any place where it can be out of the way but still within easy reach.
Upright Vacuum
Upright vacuum models are one of the most powerful types of vacuum cleaners but they are also bigger and bulkier. An upright vacuum cleaner is good if you have a dedicated storage room for cleaning equipment or a spacious laundry or mudroom where you can store cleaning equipment and accessories.
Vacuum cleaners come in a range of uses and sizes. Depending on the type of vacuum cleaner you have, you may need to get creative in making more space for your cleaning equipment. Move items around to make more space inside closets, hang racks for portable handheld vacuums, or use empty spaces under couches or beds. With a little bit of ingenuity, you can store your vacuum cleaner safely while keeping it easily accessible for regular use.
Vinyl plank flooring is surprisingly easy to clean whether you are using basic cleaning solutions or you are using sophisticated cleaning technology like the best robot vacuum for vinyl plank floors.
Vinyl plank flooring is incredibly low-maintenance which makes it a great flooring option for virtually any area of the house. The key to taking care of vinyl plank flooring is to know how you can prevent long-term damage in the first place and what the best methods are for regular maintenance.
Read on to know how you can do all these especially if you want your vinyl wood plank flooring to last for many years.
How to Prevent Damage for Vinyl Plank Flooring
While vinyl plank floors will show signs of age and wear over time, you can push this back by ensuring that your vinyl flooring is installed in the right way.
Vinyl flooring is very easy to install but you still need to make sure that installation was done according to manufacturer instructions. Otherwise, you run the risk of warping planks, uneven planks, and other defects that could lead to faster wear and tear. Start off by using the right adhesive, rolling the floor to help achieve a flat and even finish, and using protective window treatments to protect your floors from harsh sunlight.
Use Proper Adhesive
You can run into problems like buckling if your planks are not laid down properly. Using the right adhesive ensures that your vinyl plank flooring stays tight on the floor on all sides. It is also important to know what kind of flooring requires an adhesive. If you are working with glue-down vinyl planks or loose lay vinyl, you will need floor adhesive to secure the planks on the floor base.
Adhesives for vinyl flooring are often acrylic-based which are also resin-based. These are very strong and suited for strong bonding with different types of surfaces. These adhesives are sun-resistant, and can withstand regular changes in temperature, and are not easily affected by moisture. For best results, it is best to check the manufacturer's instructions on what kind of glue is suitable for your type of vinyl plank floors.
Roll the Floor
One crucial element during installation is the proper rolling of the vinyl plank flooring. Use a 100-pound roller to roll the floor after laying down the flooring with adhesive. Using this rolling weight will help secure and flatten all areas of the vinyl planks and prevent buckling over time.
Avoid Direct Sunlight
Vinyl flooring keeps its luster and color over time but direct exposure to sunlight can accelerate the process of wear. Direct sun can also strip the floors of color and shine. You can keep your vinyl floors new and shiny by protecting them from direct sunlight.
Window treatments such as blinds or curtains offer effective protection against harsh sunlight. For maximum protection, use blackout or thermal curtains especially if your interiors are exposed to lots of sunlight during the day. Another alternative is UV film or tinted windows. These can limit the amount of heat and light that can pass through the windows.
How to Clean Vinyl Plank Flooring
Daily Cleaning
Regular cleaning is also crucial to keeping your vinyl plank floors looking as good as new. For daily cleaning, wiping and mopping will usually leave you with a clean surface.
A quick run with the vacuum ensures a thorough clean that doesn't take up too much time. Use a vacuum cleaner if you don't want to spread dust around or you want to clean while you are doing other chores. Robot vacuum cleaners like the Dreame D9 can do the job in a few minutes, giving you sparkling floors in minutes without you lifting a finger.
Deep Cleaning
For a deeper clean, you can wipe the floor with a mop or rag moistened with water and dish soap/ detergent solution. This helps remove dirt, grime, and stains that may have hardened on the surface of your vinyl floors. You can also spray the solution on the floor, provided that you use a neutral detergent diluted in water. This is often enough to clean your floor and keep it in top condition for the coming week.
If you want a more organic cleaning option, swap the dish soap with white vinegar and dilute it in water. Use this for mopping or wiping the floors to remove tough stains and dirt. This vinegar solution also leaves your floors with a clean scent and a lasting shine.
If you want to make sure that you are using safe cleaning solutions, check with the manufacturer. They may have recommendations for specific cleaning solutions that will work best with your vinyl flooring. It is also important to note that you should avoid using abrasive mops and streams when cleaning your vinyl floors. Abrasive brushes can leave scratches and will thin out the protective layer of vinyl planks. Steam cleaning is also a big No-No since most vinyl plank materials are not meant to withstand steam.
How to Make Your Vinyl Floors Shine
How shiny your floors get depends on the kind of finish you have. If you have vinyl floors with a matte finish, your floor wax or polish can only do so much. However, if you have flooring with a glossy finish, you can achieve sparkly shine with ease.
A quick and easy way to make your floors shine is to use vinegar and water spray to clean your floors. Wipe dry with a microfiber cloth to buff out mop marks. If you want to see your reflection on the floors, you can also opt for floor wax made for vinyl flooring, which you can easily get from most hardware or home stores. Just make sure to clean the surface thoroughly with a soft broom. You can also use the Dreame D9 for vinyl plank floors to remove all dust and dirt before you start polishing.
Regular and careful cleaning can keep your vinyl plank floors as shiny and as scratch-free as the day you installed them. Just remember to use the right cleaning tools and to set your expectations according to the type of flooring finish that you have. With properly-installed vinyl flooring and regular cleaning, you can keep your floors shiny and clean for years.
Most people who clean their homes do regular cleaning. Professional cleaning companies do regular and deep cleaning. While you'll have to pay extra for deep cleaning, there's unmatched value for money. To understand why you should overlook DIY (Do-It-Yourself) home cleaning over professional cleaning, it's important to define the two terms.
What's the Difference Between Deep Cleaning and Regular Cleaning Your Home
Regular Cleaning
As the name suggests, regular home cleaning involves typical home cleaning tasks done to maintain typical cleanliness. While it's possible to hire a cleaning company to do regular cleaning, it costs less than deep cleaning.
Regular cleaning usually involves cleaning tasks such as sweeping floors, cleaning and mopping floors, vacuuming carpets, wiping the dust from surfaces, appliances, and fixtures, cleaning and disinfecting the bathroom, cleaning kitchen appliances, cooking pots and floors as well as cleaning doors, window frames, dusting vents, emptying the trash can, and removing cobwebs.
Deep Cleaning
Deep cleaning goes further than regular cleaning. The main difference is in the level of detail. Deep cleaning is more extensive. It includes all regular cleaning tasks as well as cleaning neglected and/or hard-to-reach areas of your home. Anything that can be cleaned is attended to. It also focuses on improving the living quality and overall sanitation of your home. Other notable differences include price. Deep cleaning is obviously more costly. It also takes longer.
How Often Do You Need to Deep Clean Your Home
As mentioned above, deep cleaning involves cleaning every cleanable place or thing in your home. While it's not possible to clean everything, there are things you must deep clean often than others.
You should deep clean your microwave, shower, toilet, bathmats, bathtubs, and carpets every week. Your refrigerator can be deep cleaned monthly, while your pillows and skirting boards should be cleaned every three months.
Windows and drapes should be cleaned thoroughly after 3-6 months. Your mattress, blankets, and duvets can be deep cleaned at least twice a year. Showerheads can wait for a year, while your oven should be deep cleaned when it starts emitting an unpleasant odor. This can even be weekly depending on the frequency, spills, etc.
Deep Cleaning House Checklist: How to Deep Clean a House
If you are looking for specifics i.e., the different places to clean in your kitchen, bedroom, etc., how to clean those places, the number of times you should clean, among other important information, here's what you should know.
Kitchen Deep Cleaning
When deep cleaning your kitchen, you should focus on the microwave, refrigerator, and oven, as these are the appliances that aren't cleaned properly during regular cleaning. As mentioned above, deep clean your microwave weekly to get rid of food splatters that act as breeding grounds for germs.
Your refrigerator should be deep cleaned monthly to eliminate food spills and other sources of germs like rotting vegetables, which can also cause serious bacterial contamination. The process of deep cleaning a refrigerator includes but isn't limited to removing everything and wiping down all compartments using an antibacterial wash.
The oven should be deep cleaned as often as possible, more so when you start to smell previously cooked food. When cleaning your oven regularly, use a damp cloth and soapy water to get rid of good spills and splashes.
Other areas and appliances that should be deep cleaned in the kitchen include dishwashers, stovetops, and sinks.
Living Room Deep Cleaning
Your living room should be deep cleaned weekly to half-yearly, depending on what is being cleaned.
Carpets cleaning should be done weekly and deep cleaned once or twice a year. However, deep cleaning can be done often if you have pets or young children that play a lot but still need a carpet that is clean throughout. Deep cleaning is also dictated by factors such as stains and dust levels in your area.
Deep cleaning carpets can be a daunting task when handled traditionally. Currently, there are deep cleaning vacuums in the market today, such as the Dreame T20 for deep cleaning your sofa, carpet, and floors.
Windows and drapes can be deep cleaned once every 3-6 months. While you can wipe the woodwork, you'll need a professional to help you deep clean other elements/parts i.e., to remove grime from your drapes and windows.
Skirting boards should be deep cleaned quarterly. Vacuuming and wiping over skirting will remove the layer of dust and pathogens (dust mites/allergens) that accumulate over time on skirting boards.
Bathroom Deep Cleaning
Bathtubs and showers should be deep cleaned weekly. Deep cleaning is crucial since bathtubs and showers are perfect breeding grounds for fungus and bacteria known to cause skin infections. Cleaning should be as thorough as possible by using antibacterial agents.
Toilets should be cleaned regularly on a daily basis, and deep cleaned every week. Like bathtubs and showers, cleaning should be done using antibacterial agents. It's also crucial to use bleach to keep your toilet free of ugly stains. A toilet cleaner will come in handy when removing mineral deposits.
Bathmats should also be cleaned weekly since they are also breeding grounds for fungus and bacteria. Use sanitizing wash or other similar detergents to get rid of harmful bugs that thrive in bathmats. After washing, dry the mat outdoors in direct sunlight to dry.
Bathroom shower heads should be deep cleaned once every year to remove minerals that build up over time and restore normal function. Deep cleaning also gets rid of dust and dirt that accumulates over time.
Bedroom Deep Cleaning
Bedroom pillows should be deep cleaned quarterly, while mattresses, duvets, and blankets should be deep cleaned twice a year. Pillows harbor dead skin, sweat, oil, dust mites, and other allergens.
Mattresses also harbor everything found in pillows and more i.e., bed bugs. Mattresses are also prone to become smelly.
Duvets and blankets also accumulate dust and allergens. All the bedroom items should be deep cleaned by professional cleaners. You can do regular cleaning; however, deep cleaning should be left to professionals for obvious reasons. While it looks costly, it's important to consider the health implications of disregarding deep cleaning requirements.
It's also important to choose reputable professional deep cleaners. It may be possible to deep clean some elements/places in your home with the help of state-of-the-art appliances. Make deep cleaning fast, easy, and efficient with the Dreame T20 right now!
A recent global air quality survey shows that 50% of the world's population suffers from household air pollution effects. The importance of boosting indoor air quality can't, therefore, be overemphasized.
To understand how to improve indoor air quality in Winter, you must first know what causes poor indoor air quality during Winter in the first place. Effects of poor indoor air quality are dire. The solutions range from taking simple measures like ventilating your home to finding the best vacuum for air quality. However, let's first discuss indoor air quality management in Winter and related issues.
What Are the Issues Behind Poor Air Quality in Winter?
Indoor air quality reduces in Winter since homeowners become more conscious of air leaks around windows, doors, rim joists, piping, etc., and result in insulation, among other efforts to boost comfort and lower heating bills. People tend to keep doors and windows locked tightly during Winter to maintain indoor warmth; however, these have negative effects.
Poor circulation of air indoors allows a buildup of bacteria, viruses, dust mites, mold spores, and other pathogens responsible for many health problems ranging from headaches, fatigue, and dizziness to more severe effects like respiratory diseases, cancer, and heart disease, according to the EPA. Volatile organic compounds (from paint, cleaning agents, etc.), pets, smoke, etc., are also to blame for poor air quality indoors.
5 Ways to Improve Indoor Air Quality
Given the effects of poor indoor air quality in seasons like Winter, it's important to take certain measures. Here's how to improve indoor air quality in five simple ways.
Grow Plants
You can grow some indoor plants to boost your indoor air quality. Numerous studies, including one done by NASA, have linked indoor plants to improved air quality. Houseplants can absorb harmful pathogens in the air. They work perfectly in tight spaces and rooms with little to no airflow. While plants may be slower than air purifiers regarding their indoor air purifying capabilities, they have other notable benefits. For instance, plants are more therapeutic and cost-effective than air purifiers.
However, you need a specific number of plants to realize indoor air quality benefits i.e., 2-3 plants for every 100-square feet of indoor space. Some plants are also better than others at purifying the air. Areca palm, snake plant, money plant, and Chinese evergreens are examples of good indoor plants to consider for better indoor air quality.
Monitor Indoor Air Quality
To improve air quality indoors, you must first know your indoor air quality status. Indoor air quality monitors (IAQ monitors) offer accurate data on air quality, allowing you to take effective improvement measures. The best IAQ monitors today can detect almost all pollutants indoors, including radon - the chemical linked to 13.4% of all lung cancer-related deaths in the U.S. IAQ monitors can detect volatile organic compounds (VOCs) responsible for many respiratory health problems like sinuses.
The benefits of monitoring indoor air quality include identifying the specific pollutant in your home to be able to find effective ways of getting rid of that pollutant. You can be able to know exactly when to ventilate during Winter when the levels of a certain pollutant surpass a certain level.
A good air quality monitor will monitor many other metrics, including indoor temperature, air pressure, and humidity, that are linked to how we feel and perform. Imbalances in temperature, air pressure, and humidity are common causes of headaches, migraines, joint pain, and blood pressure variations. There's even evidence linking indoor air quality to impaired thinking.
Open Your Windows
It's understandable why people don't like opening their windows during Winter. The effort associated with keeping your indoor environment warm and comfortable usually outweighs the need for fresh air. However, you must open your windows periodically to keep your indoor air quality level safe. If you have an indoor air quality monitor, you can know the exact time to ventilate.
Clean and Vacuum More Often
Keeping your floor and floor covering as carpets and mats can also boost your indoor air quality immensely. There is a clear link between carpets and poor indoor air quality. Carpets are linked to an increased allergen, dust, and pathogen levels in homes. The link between carpets and health problems like asthma, anxious symptoms, and mild cognitive effects is also clear.
Carpets, mats, and dirty floors harbor dust, dust mites, mold, and many pathogens linked to indoor air quality problems. All these problems can be solved by vacuuming and moping your floor more often, especially during Winter when air circulation is poor. However, most vacuum cleaners won't get the job done. Some vacuum cleaners worsen indoor air quality by releasing dust, bacteria, and allergens back into the air. Mops also need to be clean, otherwise, they'll also reintroduce pathogens.
To solve this problem, consider the best vacuum for air quality out there today with a HEPA filter, such as the Dreame D9 robot vacuum. The Dreame D9 is a vacuum cleaner, mop, and robot all in one offering unparalleled stress-free cleaning experiences. It uses a laser system and smart algorithm to map a cleaning route in your home and clean efficiently and thoroughly while avoiding obstacles with ease.
Change Furnace Filters Regularly
Since indoor heating needs increase drastically, furnace filters are bound to gather particulate matter faster. Furnace filters won't work as efficiently as they do during winter if you don't replace them regularly. Removing dirty and clogged filters more than once during Winter will ensure the trapped particulate matter doesn't recirculate back.
After taking the measures above, you won’t have indoor air quality management problems. You should start by monitoring the quality of your air indoors before purposing to open windows and doors more often, adding indoor plants, opening your windows more often, and replacing your furnace filters. Most importantly, you should invest in a good vacuum cleaner and mop like the Dreame D9 proven to clean your carpet, rugs, and floors automatically.
While innumerable pathogens harbor the environment, you can effortlessly clear them with the help of an antibacterial floor cleaner. Disinfectants take your cleaning exercise to the next level since they eliminate all micro-organisms that cause diseases.
Consequently, they help stop the spread of contagious ailments that would otherwise wreak havoc if they spread. You have to find detergents and cleaning solutions that kill both bacteria and viruses for you to have a successful disinfecting exercise.
If you are looking for a full-proof method of disinfecting floors, herein is the best way to disinfect floors using the Dreame robot vacuums and easy to find house cleaning products.
The Difference Between Cleaning and Disinfecting
Most people assume that there is no difference between cleaning surfaces and disinfecting. There is a thin line between them that makes it difficult for most folks to differentiate. So, what exactly is the difference between the two procedures?
Cleaning
Cleaning is the act of removing dirt from a surface to keep the environment looking clean and neat. People clean surfaces frequently using soap and water, and it is a prerequisite to disinfecting the floor with antibacterial cleaning products.
This process is relatively fast since you aim to remove soil, debris, and stains from the floor. You can scrub or mop the surface depending on the amount of dirt you are cleaning.
Disinfecting
Unlike cleaning, disinfectant requires you to use chemicals such as bleach to clean the surface. These chemicals remove germs, bacteria, and viruses that spread diseases.
In this process, you have to allow the disinfectant to set on the surface for a specified period before wiping it off. This dwelling time allows the disinfectant to kill the pathogens.
Tips for Disinfecting Floors
Disinfectants differ from cleaning detergents in chemical composition, making them harsh. Therefore, you need to use pro tips when handling antibacterial cleaning products to avoid damaging your floor and skin.
Here are some of the pro tips you can incorporate into your disinfecting routine to achieve stellar results.
Always cover up using protective gear while preparing and using a disinfectant.
Ensure that your floor is free of soil and general dirt before applying antibacterial cleaning products. Additionally, allow the floor to dry before proceeding to the next step.
For the best results, use an antibacterial floor cleaner that the Environmental Protection Agency recommends for your floor type.
Keep the disinfectant on the floor for the specified time so that it removes the pathogens you want to eliminate.
Read the instructions provided on the packaging. These will help you learn how to handle the solution and how and where to store it after disinfecting the surfaces.
Seal the containers well and store them away from children. And once you deplete your solution, discard the container appropriately.
Use a spray applicator, antibacterial cleaning cloth, or auto-scrubbers to apply the solution on the floor.
Now that you know what to do before and while cleaning, we can learn how to disinfect the floor using the Dreame robot vacuum.
The Right Way to Use Antibacterial Floor Cleaner with Dreame Robot Vacuum
When you want to disinfect the floor with Dreame robot vacuum, you have to incorporate a disinfectant that will help achieve top-notch hygiene standards. Antibacterial floor cleaners are a bit harsh, especially acidic ones, thanks to the chemical formula manufacturers use in their production.
Thus, you have to find a friendly way to use them not to damage your cleaning robot. You are not recommended to add anything other than water into the vacuum tank. The Dreame robot vacuum manufacturer designed the tank to accommodate a neutral solution like water.
The acidic antibacterial cleaners will erode the tank from inside, eventually creating holes that will leak water into the mortar. Once water gets to the machine, it is game over for you. The water will ruin your robot vacuum, creating the need to get a new one.
And if you think using detergents and soap in the tank is equally fine, you are in for a rude shock. Considering that the pipes have a design that accommodates only water, adding other cleaning agents into the tank will cause the pipes to clog. Consequently, the clogged pores will reduce the machine's shelf life significantly.
Instead of adding solutions into the tank, you can soak the antibacterial cleaning cloth in the disinfectant, then attach it to the robot cleaner and disinfect the house. As the mop spreads the disinfectant, the bot dispenses water to cover the 200m² surface area.
You can do the same with cleaning solutions when you want to clean the floors. Remember to dilute the solution to avoid ruining your Dreame robot vacuum. You can also apply the solution to the floor using a spray bottle and let it sit for some minutes before you command your robot to clean the surface.
Wrap Up
The best way to disinfect floors is, to begin with cleaning the surface. Remove all the dirt and ensure that the floor is spotlessly clean. Allow the floor to dry before you begin disinfecting it using the floor type's right cleaner.
A majority of the disinfectants come as concentrated solutions, so read the instructions to learn how to dilute them before using them on your floor. And while you are at it, remember to protect your hands and face from the harsh chemicals using protective kits.
Allow the antibacterial cleaning agent to dwell on the floor for some time so that it can kill the disease-causing pathogens. Failure to do so will result in wasted efforts, and you will have wasted resources too.